ASIO4ALL on Mac and the Core Audio alternative
ASIO4ALL is for Windows audio applications. On a Mac, your recording app normally uses Core Audio and selects a built-in or connected audio device. The release notes for Windows ARM64 refer to Windows PCs. Apple silicon Macs use the macOS setup below.
In this guide
Does ASIO4ALL work on Mac?
No. ASIO4ALL is a Windows driver, so there is no ASIO4ALL Mac version, and a Mac does not need one. On macOS, your recording app uses Core Audio and selects a built-in or connected audio device directly, which already gives you the device access ASIO4ALL provides on Windows.
This guide explains why the driver is Windows only, then walks through the macOS equivalent: setting up one interface or USB microphone, combining devices with an Aggregate Device, and tracing delay or crackles to a specific change. It is a practical expert guide, not publisher documentation.
Quick orientation
- On Windows, choose ASIO4ALL v2 in your DAW when your hardware has no dedicated ASIO driver.
- On a Mac, choose the interface or microphone itself in your app's audio settings. Core Audio handles the rest.
- To combine devices on a Mac, use an Aggregate Device in Audio MIDI Setup instead of ASIO4ALL's aggregation.
Why ASIO4ALL is a Windows-only driver
As the publisher's overview describes, ASIO4ALL works on top of the existing WDM drivers in Windows. It takes the audio devices Windows already knows about and presents them to an ASIO host as a single low-latency device. WDM is part of the Windows driver model, so the driver has nothing to attach to on macOS.
ASIO itself grew up as a way for Windows DAWs to bypass the slower parts of the Windows audio stack. macOS took a different path. Core Audio is the system's own audio layer, and recording apps talk to it directly with buffer sizes small enough for real-time monitoring.
What about Apple silicon and ARM64?
ASIO4ALL 2.22, released July 23, 2026, added native ARM64 and ARM64EC support. The 2.22 release notes refer to Windows on Arm PCs, not to Macs. Apple silicon Macs also use ARM processors, but they run macOS and Core Audio, so the setup in this guide applies to them. If you also own a Windows on Arm laptop, our ASIO4ALL Windows ARM64 guide covers that side.
| Task | Windows with ASIO4ALL | macOS with Core Audio |
|---|---|---|
| Driver the DAW selects | ASIO4ALL v2 | The interface or microphone by name |
| Underlying device driver | WDM drivers | Core Audio, plus any vendor software |
| Combining two devices | ASIO4ALL device aggregation | Aggregate Device in Audio MIDI Setup |
| Buffer setting | ASIO4ALL panel or DAW | The recording app's audio settings |
Use one audio device first
Connect the interface and check its manufacturer's support page for macOS compatibility and any model-specific software. Many class-compliant interfaces and USB microphones work without extra software, but some models need a control app for routing or clock settings.
Check the device in Audio MIDI Setup
Open Audio MIDI Setup in Applications › Utilities. Choose Window › Show Audio Devices if the device list is closed. Select the interface and check the input and output formats it offers, including the sample rates it supports.
Select it in your recording app
In your recording app's audio settings, choose the interface for both input and output when it has the connections you need. Set a supported sample rate that suits the session, such as 44.1 kHz for music or 48 kHz for video and podcast work, and confirm that the app sees the input channel.
Make a brief test recording before changing the buffer or adding more hardware. If the app receives silence, check microphone access under System Settings › Privacy & Security › Microphone. Apple's guide to troubleshooting microphone access covers the permission prompts in more detail.
Tip: Name your test track with the date and settings, such as "48k-128-test". It makes comparisons much easier when you return to troubleshoot later.
Combine a USB microphone and a separate output
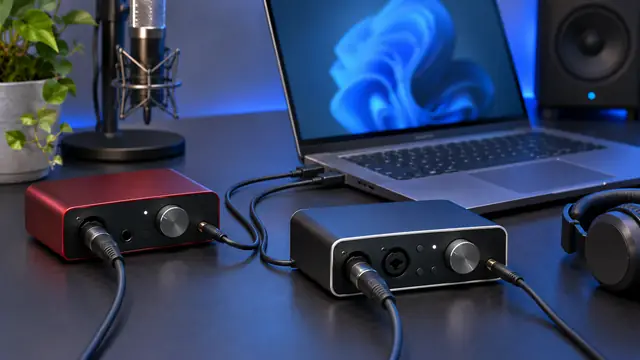
Some recording apps let you select input and output devices separately. If your app needs a single device and you want a USB mic for capture with another device for playback, use an Aggregate Device. This is the closest Mac equivalent to ASIO4ALL device aggregation on Windows.
Create an Aggregate Device
- Connect the hardware, open Audio MIDI Setup and click the add button in the Audio Devices window. Choose Create Aggregate Device.
- Select the devices you need. Put them in the order you want to see their channels and choose the clock source.
- Use matching supported sample rates and follow Apple's drift correction instructions for devices that lack hardware clock synchronization.
- Select the aggregate in the recording app and check the mic channel and headphone output with a dry test track.
Apple's support article on creating an Aggregate Device explains clock source and drift correction choices. The same principle applies on Windows: two devices with separate clocks can slowly drift apart, which our device aggregation guide explains for ASIO4ALL users.
Watch out: If one device in the aggregate does not support the session's sample rate, you may hear clicks or get no audio. Check each device's formats in Audio MIDI Setup before building the aggregate.
Buffer size and latency on a Mac
Core Audio apps expose a buffer size setting much like the ASIO4ALL slider on Windows. The maths is identical on both platforms: samples divided by sample rate, multiplied by 1000, gives milliseconds per buffer.
Typical values
- 128 samples at 48 kHz is about 2.7 ms, suited to playing instruments and monitoring through effects.
- 256 samples at 48 kHz is about 5.3 ms, a common balance for recording vocals or guitar.
- 512 samples at 48 kHz is about 10.7 ms, comfortable for mixing larger sessions.
- At 44.1 kHz, 256 samples is about 5.8 ms.
Lower buffers ask more of the processor each second. If playback crackles at a small value, raise the buffer one step rather than jumping straight to the maximum. Our buffer size guide explains the trade-off in depth, and nearly all of it applies to Core Audio apps too.
Trace delay or crackle to a specific change
If playback becomes unstable when you combine devices, test each device alone again at the session's rate. Check the clock source and drift correction before touching the buffer, because a clocking problem will not be fixed by a bigger buffer.
Separate project load from device problems
For monitoring delay in a busy project, compare a dry track in an empty session at the same settings. If that empty session feels faster, inspect the effects or routing in the busy project. Some plug-ins add their own latency, which no driver setting can remove.
Keep a record of what works
Record the working sample rate and device selection once the setup is stable. These settings help when you reconnect the interface or open an older session that expects a different input order. If you move between a Mac and a Windows PC, keep a separate note for each, since the Windows side will list ASIO4ALL v2 settings while the Mac side lists device names.
Note: If you are curious how other operating systems handle this, our ASIO4ALL on Linux guide covers ALSA, JACK and PipeWire.
Moving sessions between Windows and Mac
Many home studios mix platforms: a Windows desktop running ASIO4ALL in the studio and a MacBook for sketching ideas or recording on the road. The good news is that the audio fundamentals carry over even though the driver does not.
What carries over
- Sample rate: a 48 kHz project should stay at 48 kHz on both machines. Mismatched rates cause pitch or speed problems when you import files.
- Buffer thinking: 256 samples at 48 kHz is about 5.3 ms whether the setting lives in ASIO4ALL or in a Core Audio app.
- Device habits: enable or select only the inputs and outputs a session needs, and test a dry track before adding effects.
What changes
On Windows, you select ASIO4ALL v2 in the DAW and then enable devices in its control panel, which works on top of the WDM drivers. On the Mac, you select the device itself and, when needed, an Aggregate Device. Input channel numbers can also differ between the two setups, so check your track inputs when you open a session on the other machine.
Exporting stems or consolidated audio files at the session's sample rate is the most dependable way to move work between platforms. It avoids surprises from plug-ins that exist on only one system.
Frequently asked questions
No. ASIO4ALL works on top of Windows WDM drivers and officially supports Windows 10 and Windows 11. On a Mac, recording apps use Core Audio and select your device directly.
No. The ARM64 and ARM64EC support in 2.22 is for Windows on Arm PCs. Apple silicon Macs run macOS, so they use Core Audio rather than an ASIO driver.
An Aggregate Device created in Audio MIDI Setup. It combines devices such as a USB microphone and a headphone output into one device your app can select, with a chosen clock source and optional drift correction.
Check that the app has permission under System Settings › Privacy & Security › Microphone, then confirm the correct input device and channel are selected in the app's audio settings.
Sources and further reading

We write expert, hands-on guides for Windows musicians, podcasters and producers. Driver facts are checked against the publisher's manual and release notes; DAW steps against each vendor's documentation.