ASIO4ALL Documentation and Control Panel Settings
The official ASIO4ALL manual is organized by control and task. Use the host setup chapter when the driver is missing, the device list reference when you cannot start an input or output, and the buffer chapter when a working session has too much delay or intermittent crackles.
In this guide
What the ASIO4ALL documentation covers
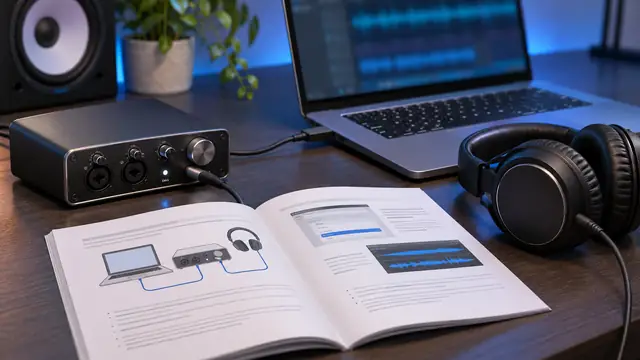
The official ASIO4ALL documentation is the instruction manual on asio4all.org, and it is organized by control and by task rather than as one long read. Open the host setup chapter when the driver is missing from your DAW, the WDM Device List chapter when an input or output will not start, and the buffer chapter when a working session has too much delay or occasional crackles.
This guide is an expert, hands-on walkthrough of how to use that manual alongside the ASIO4ALL v2 control panel. It does not replace the publisher's text. Instead, it shows which chapter answers which symptom, how to read the panel while you change settings, and what to write down before you ask anyone for help.
Who the manual is written for
ASIO4ALL is a free universal ASIO driver for Windows 10 and Windows 11. It sits on top of the WDM drivers your audio hardware already uses and presents them to a DAW as a single ASIO device. The documentation assumes you already have a host application and some audio hardware, whether that is a laptop's built-in chip, a USB microphone or a class-compliant interface.
- Home producers who need low latency for playing virtual instruments in real time.
- Podcasters recording a USB microphone and monitoring on headphones.
- Musicians who track guitar or vocals through software effects and need a stable buffer.
Start with the host setup chapter
The Getting Started chapter shows where several common DAWs expose their driver choice and their control panel button. In every case the pattern is the same: find the driver type setting, choose ASIO, then select ASIO4ALL v2 as the device.
The system tray icon appears while an application has initialized the driver. That small detail is one of the most useful checks in the whole ASIO4ALL documentation, because it confirms what your host is actually using rather than what you think you selected.
Where common DAWs keep the setting
| DAW | Menu path | What to select |
|---|---|---|
| FL Studio | Options › Audio settings | ASIO4ALL v2 as the device |
| Ableton Live | Options › Settings › Audio (older: Preferences) | Driver type ASIO, then ASIO4ALL v2 |
| Cubase | Studio › Studio Setup › Audio System | ASIO4ALL v2 as the ASIO driver |
| REAPER | Options › Preferences › Audio › Device | Audio system ASIO, then ASIO4ALL v2 |
If ASIO4ALL v2 is not in the list at all, the issue is usually installation or host configuration rather than a setting inside the driver. Our ASIO4ALL not working guide covers that path step by step.
Tip: Open the control panel from inside your DAW, not from a shortcut. That way the panel reflects the instance of the driver your host has loaded.
Read the WDM Device List chapter
Once the host can see the driver, the WDM Device List reference becomes the most important part of the ASIO4ALL documentation. It explains the status icons that sit next to each input and output, and the difference between enabling a device and highlighting it.
Status icons in plain terms
An inactive item may be available but idle. That is normal for a device you enabled but your project is not currently using. An unavailable item can be held by another program, such as a browser, a video call app or a second DAW that already opened the hardware.
- Inactive usually means present but not in use. No action is needed unless you expected audio from it.
- Unavailable usually means something else owns the device. Close other audio applications and restart the host's audio engine.
- Active devices are the ones currently passing audio for your session.
Enable versus highlight
The enable button chooses which device the driver can use. Highlighting a device, by contrast, determines which device's parameters you are editing. Those are two different actions, and confusing them is behind many "my setting did not change anything" reports.
For example, you might enable a USB microphone and the laptop's headphone output, then move the buffer slider while the microphone is highlighted. The change applies to the highlighted entry, so check that the device you meant to adjust is the one selected before you judge the result.
Watch out: Enabling every device in the list is rarely helpful. Each extra device is another clock and another WDM driver that can introduce dropouts. Enable only the inputs and outputs your session needs.
Use the buffer chapter with the panel open
The ASIO Buffer Size reference distinguishes the slider position from the indicated buffer size in use. If the two differ, verify that you highlighted the active device and check whether the host is overriding the request or needs to restart its audio engine.
The buffer maths behind the slider
Buffer latency in milliseconds is samples divided by sample rate, multiplied by 1000. Smaller buffers mean lower latency but more work for the CPU per second, which is why very small values can crackle on a busy system.
| Buffer (samples) | At 44.1 kHz | At 48 kHz |
|---|---|---|
| 128 | ≈ 2.9 ms | ≈ 2.7 ms |
| 256 | ≈ 5.8 ms | ≈ 5.3 ms |
| 512 | ≈ 11.6 ms | ≈ 10.7 ms |
| 1024 | ≈ 23.2 ms | ≈ 21.3 ms |
These figures describe a single buffer. What you hear when monitoring through software includes input and output stages plus any hardware and driver overhead, so the total round trip is always higher than the table value.
A repeatable way to test buffer changes
- Open a short, simple session that reproduces the problem, such as one instrument track or one microphone track with monitoring on.
- Open the ASIO4ALL control panel from the host and highlight the device that is actually active.
- Move the buffer slider one step and confirm the indicated buffer size changes to match.
- If the host asks, restart its audio engine, or stop and start playback.
- Listen to the same passage after each change and note whether crackles or delay improved.
- Stop at the smallest buffer that plays cleanly for the whole passage.
For deeper guidance on picking a value for recording versus mixing, see our ASIO4ALL buffer size guide.
Advanced configuration chapters
Once playback and recording are reliable, the advanced configuration chapters of the ASIO4ALL documentation cover aggregation and latency compensation. Open the chapter that matches your actual problem rather than reading them in order.
Aggregation
Aggregation lets the driver combine more than one WDM device into a single ASIO device, for example a USB microphone for input and a separate headphone output. It is convenient, but devices with separate clocks can drift. Our device aggregation guide explains when that trade-off is worth it.
Latency compensation
The latency compensation reference deals with how recorded audio lines up on the timeline. That is a different problem from the delay you hear live through software monitoring. If a recorded take sits slightly late against the click, compensation is the right chapter. If you hear yourself late while playing, the buffer chapter is the right one.
Note: Change one advanced setting at a time and keep a short note of the previous value. That makes it easy to undo a change that did not help.
Match the documentation to your version
Use the publisher's version history if a manual chapter mentions behavior introduced in a newer release. An older build's interface may differ from what you see in a current article, so screenshots and option names may not line up exactly.
Recent releases worth knowing
- 2.20 (April 27, 2026) added the option to pause host audio from the system tray.
- 2.21 (June 10, 2026) improved USB Audio Class 1 behavior at 44.1 kHz.
- 2.22 (July 23, 2026) added native ARM64 and ARM64EC support on Windows on Arm, improved dropout prevention in certain cases, and set defaults that work with Qualcomm Aqstic mic array input.
If the tray pause action described in the ASIO4ALL documentation is missing on your machine, you are almost certainly on a build older than 2.20. The current installer is ASIO4ALL_2_22.exe from asio4all.org. Our version history overview summarizes earlier releases.
Document a symptom before asking for help
Good notes turn a vague "it crackles" into something a support team can act on. Before you post on a forum or contact the publisher, device maker or DAW vendor, collect the details below.
What to record
- ASIO4ALL driver version and Windows version (Windows 10 or Windows 11, plus build if you know it).
- Host application and its exact version.
- Audio device or devices, and whether they are USB, built-in or a dock.
- Selected sample rate and the indicated buffer size in use.
- The exact status of each item in the WDM Device List.
Add the steps that reproduce the symptom and say whether a simple empty project behaves the same way. These details make it easier to identify which part of the audio path needs attention: the driver, the WDM driver underneath it, the hardware, or the host.
Keep a baseline
Once your setup works, write down the working settings as well. A known-good baseline is the fastest way back after a Windows update, a new USB hub or a DAW upgrade changes behavior.
Frequently asked questions
The publisher hosts the instruction manual on asio4all.org, alongside separate reference pages for getting started, the WDM Device List, buffer size and latency compensation. This site is a dedicated guide that links to those pages rather than copying them.
The manual notes that the slider position and the indicated buffer can differ. Check that the active device is highlighted, then see whether the host overrides the request or needs its audio engine restarted.
An unavailable item can be held by another program. Close browsers, call apps or other DAWs that may be using the hardware, then restart the host's audio engine and check the status again.
Mostly, but features added later, such as the tray pause option from 2.20, will not appear in older builds. Compare the chapter with the version history and update to 2.22 if you want the documentation and the interface to match.
Sources and further reading

We write expert, hands-on guides for Windows musicians, podcasters and producers. Driver facts are checked against the publisher's manual and release notes; DAW steps against each vendor's documentation.